Starting a Backtest Session
This guide covers everything before the first candle runs: entering Backtest, the Trader's Guard carry-over question, setting your demo balance, and choosing where the replay starts.
Entering and leaving
To enter, click the Backtest button at the top-left of the chart toolbar. It is available on desktop, tablet, and mobile.

Upon entering Backtest:
- A dialog will ask whether you want to carry over your active Trader's Guard risk rules to the simulation session.
- The Backtest button highlights in purple to indicate Backtest mode is active.
- A Deposit chip appears directly next to the Backtest button, displaying your demo balance.
- The Replay toolbar appears docked directly below the chart.
- A subtle Back Test watermark is shown on the chart background.
- The Balance / Equity tab is added to the bottom panel (and the Deals sub-tab under History is hidden).
- The symbol being replayed is temporarily pinned to the top of the Markets symbol list.

How to exit Backtest
You can leave Backtest in two ways:
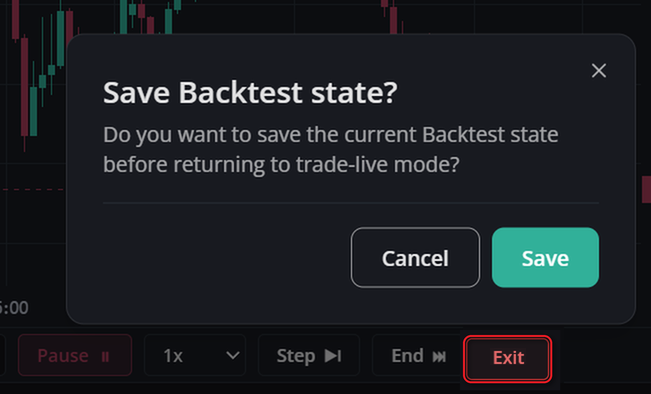
1. Exit button on the Replay toolbar: If the simulation is currently active and in progress, clicking Exit opens a prompt asking "Save Backtest state?". If the run has not started yet or has already completed, clicking Exit returns immediately to live trading.
2. Backtest button on the top toolbar: Clicking the Backtest button on the top toolbar leaves immediately without prompting to save.
If you want the option to save your progress and continue the session later, use the Exit button on the Replay toolbar. Note that the top Backtest button is disabled while replay is playing — press Pause before leaving.
Setting your demo balance and leverage
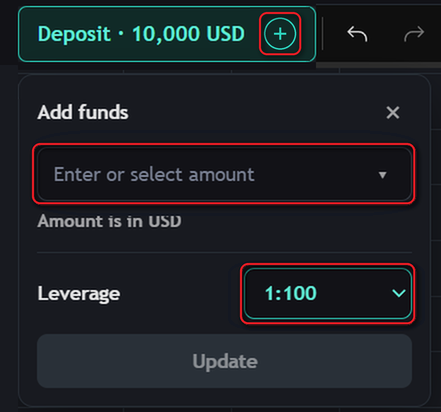
Click the Deposit chip (or its + icon) to open the Add funds settings panel.
- Currency: USD.
- Default balance: 10,000 USD.
- Quick amounts: 1,000 / 2,000 / 5,000 / 10,000 USD via the dropdown menu.
- Custom amount: The "Enter or select amount" field accepts any custom deposit value.
- Leverage: 1:1, 1:10, 1:50, 1:100 (the default), or 1:200.
Click Update to apply your changes.
Two important rules to keep in mind:
- The amount replaces your balance: It does not add funds on top of existing equity. The panel confirms this directly: "Account balance will be set to [amount] USD".
- Deposit locks once replay starts: As soon as the first candle runs, the deposit amount is locked for that session and the panel title changes to "Account settings". However, Leverage remains editable at any time throughout the simulation.
To trade with a different starting balance once a run is underway, select a new start point with Select bar or Select date to begin a fresh run.
Choosing where the replay starts
Before replay can run, you must choose a historical starting point. Until you select one, the Play button remains disabled with the tooltip "Choose a start point first."
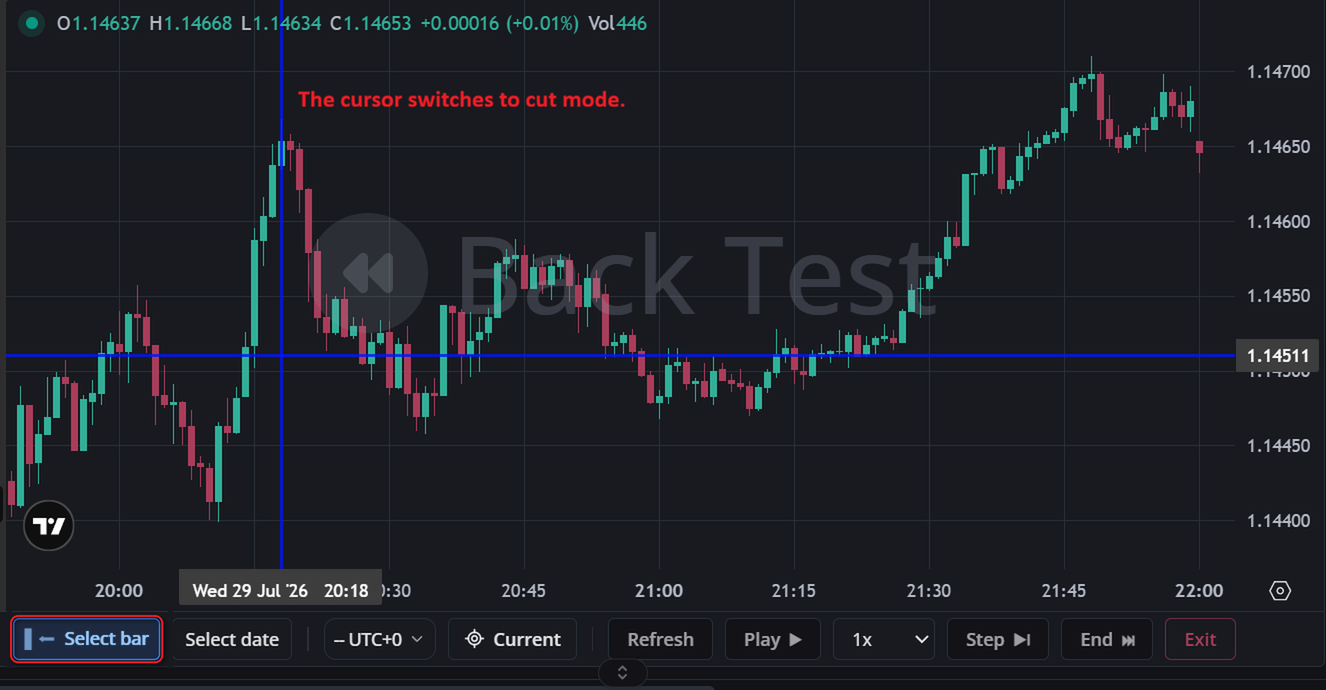
Option 1 — Select bar: Click Select bar on the Replay toolbar. The button highlights in blue and the cursor switches to crosshair selection mode. Click directly on the body of any candle on the chart to set your starting point. If you click on empty space where no candle exists, a notice will remind you: "No candle there. Click directly on a candle to set the replay start point."
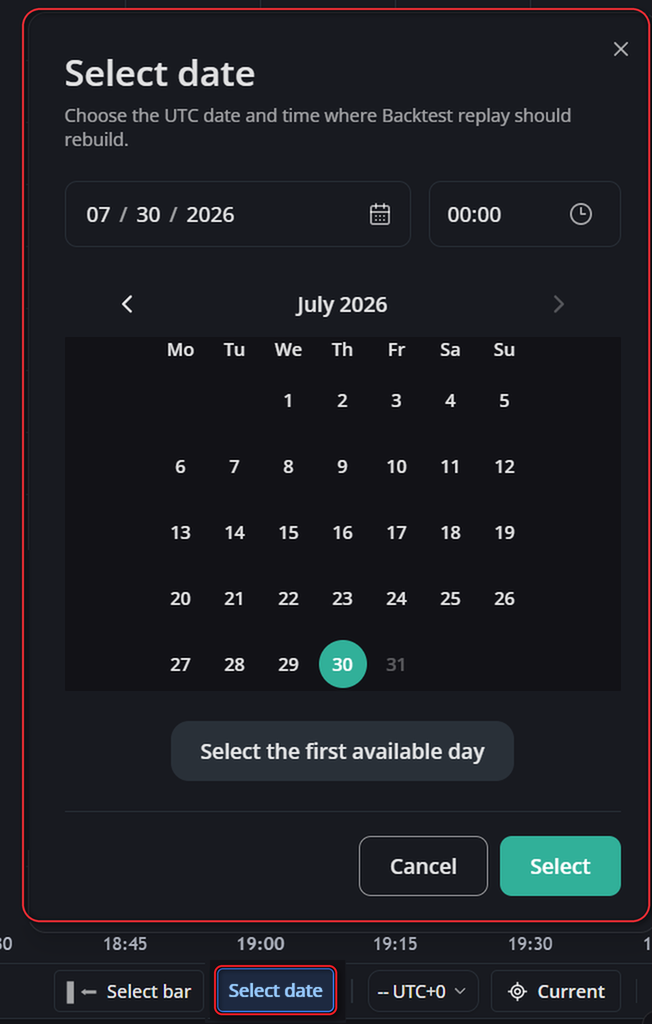
Option 2 — Select date: Click Select date to open the UTC date and time picker. You can type the year, month, day, hour, and minute, or use the up and down arrow keys to adjust values. A built-in interactive calendar allows quick day selection, and clicking the month/year header opens the month picker. The Select the first available day button automatically jumps to the earliest historical data date available. Click Select to apply.
While the chart prepares the historical data, the Play button briefly reads "Preparing" and the selection controls are temporarily locked.
The Refresh button: The green Refresh button on the toolbar clears your selected starting point and restores the chart back to the live present. It is active only after you have picked a start point and before you press Play, making it easy to reset if you picked the wrong candle.